本文环境: org.springframework.cloud:spring-cloud-starter-oauth2:2.2.4.RELEASE
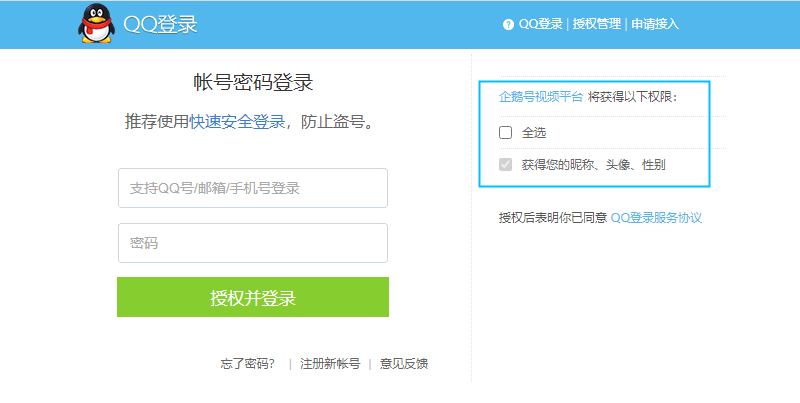
本文场景: 希望实现类似 QQ 的登陆并授权功能,但是将 /oauth/authorize 路径加入 permitAll 没有生效,加入 web.ignoring() 后抛出了 User must be authenticated with Spring Security before authorizing an access token. 异常,在 Spring Oauth2 中 /oauth/authorize 界面必须登陆才可以访问。本文描述了基于 Spring Oauth2 的 code 模式,实现登陆同时授权、自定义授权界面、数据库结构功能的实现。
要说明的是 Spring Oauth2 支持登陆默认授权,也就是 clients.autoApprove() 配置,但是功能有些鸡肋,当有多个权限时,其中只要有一个权限没有加入到默认授权,都将跳转到授权界面。而本文想要实现的是在登陆前可以自定义选择需要授权的权限,然后直接登陆授权,如果可以确认所有权限都必须授权则可以直接在 clients.autoApprove() 中配置。
1. 自定义授权界面
Spring Oauth2 中 AuthorizationEndpoint 类负责授权功能的实现。
官方对该类的说明: OAuth2 规范中授权端点的实现。 接受授权请求,如果授权类型为授权码,则处理用户批准。 令牌本身是从 Token Endpoint ,但隐式授予类型除外(在 Token Endpoint ,令牌本身是通过授权端点通过 response_type=token 来获得的)。
此端点应受到保护,以便只有经过完全身份验证的用户才能访问它(作为最低要求),因为它代表有效用户的代表其执行操作的请求。
在该类中 authorize 方法添加了 @RequestMapping(value = "/oauth/authorize") 注解,可以看到是在该方法响应对授权界面的请求的,源码如下:
	@RequestMapping(value = "/oauth/authorize")
	public ModelAndView authorize(Map<String, Object> model, @RequestParam Map<String, String> parameters,
			SessionStatus sessionStatus, Principal principal) {
        // 根据请求参数(client_id、scope)验证客户端请求的权限是否符合要求
		// 根据请求参数(client_id、state、redirect_uri、response_type)中的信息创建AuthorizationRequest
		AuthorizationRequest authorizationRequest = getOAuth2RequestFactory().createAuthorizationRequest(parameters);

		Set<String> responseTypes = authorizationRequest.getResponseTypes();
        // 授权类型不包含当前类型
		if (!responseTypes.contains("token") && !responseTypes.contains("code")) {
			throw new UnsupportedResponseTypeException("Unsupported response types: " + responseTypes);
		}
        // 客户端不存在
		if (authorizationRequest.getClientId() == null) {
			throw new InvalidClientException("A client id must be provided");
		}

		try {
            // 未通过登录认证,没有通过登录时就是此处抛出的异常
			if (!(principal instanceof Authentication) || !((Authentication) principal).isAuthenticated()) {
				throw new InsufficientAuthenticationException(
						"User must be authenticated with Spring Security before authorization can be completed.");
			}
            // 取得客户端实例
			ClientDetails client = getClientDetailsService().loadClientByClientId(authorizationRequest.getClientId());

			// 校验请求的重定向路径是否合法
            String redirectUriParameter = authorizationRequest.getRequestParameters().get(OAuth2Utils.REDIRECT_URI);
			String resolvedRedirect = redirectResolver.resolveRedirect(redirectUriParameter, client);
            if (!StringUtils.hasText(resolvedRedirect)) {
				throw new RedirectMismatchException(
	"redirectUri must be either supplied or preconfigured in the ClientDetails");
			}
			authorizationRequest.setRedirectUri(resolvedRedirect);

			// We intentionally only validate the parameters requested by the client (ignoring any data that may have
			// been added to the request by the manager).
			oauth2RequestValidator.validateScope(authorizationRequest, client);

			// Some systems may allow for approval decisions to be remembered or approved by default. Check for
			// such logic here, and set the approved flag on the authorization request accordingly.
			authorizationRequest = userApprovalHandler.checkForPreApproval(authorizationRequest,
					(Authentication) principal);
			// TODO: is this call necessary?
			boolean approved = userApprovalHandler.isApproved(authorizationRequest, (Authentication) principal);
			authorizationRequest.setApproved(approved);

			// 是否自动通过
            // 可以看到在这一步将校验是否自动通过授权,所以必须先校验用户的真实性
			if (authorizationRequest.isApproved()) {
                // 返回token
				if (responseTypes.contains("token")) {
					return getImplicitGrantResponse(authorizationRequest);
				}
                // 跳转从定向接口
				if (responseTypes.contains("code")) {
					return new ModelAndView(getAuthorizationCodeResponse(authorizationRequest,
							(Authentication) principal));
				}
			}

			// Store authorizationRequest AND an immutable Map of authorizationRequest in session
			// which will be used to validate against in approveOrDeny()
			model.put(AUTHORIZATION_REQUEST_ATTR_NAME, authorizationRequest);
			model.put(ORIGINAL_AUTHORIZATION_REQUEST_ATTR_NAME, unmodifiableMap(authorizationRequest));
			// 重定向登陆和授权界面,"forward:/oauth/confirm_access"
			return getUserApprovalPageResponse(model, authorizationRequest, (Authentication) principal);

		}
		catch (RuntimeException e) {
			sessionStatus.setComplete();
			throw e;
		}

	}
通过以上分析可以得出:
/oauth/authorize负责的逻辑是进行code和token方式的权限校验,可以直接判断客户端是否具有某些权限,然后响应,所以该方法必须授权保护;/oauth/confirm_access是实际上打开授权界面的视图。
所以:
-
如果只是要修改授权界面,那么只需要添加一个
/oauth/confirm_access控制器覆盖默认的控制器即可; -
如果要让
/oauth/authorize界面在未校验权限验证下也可以进入,那么需要使自动授权功能失效(不然没有保护直接授权了),同时修改token模式的验证逻辑,整体逻辑都需要修改。
解决方法:
所以我们可以实现一个 OauthController 继承 AbstractEndpoint 类,作为自己的 AuthorizationEndpoint,然后修改 authorize, approveOrDeny 的逻辑如果没有修改,自定义控制器时需要给类添加注解 @SessionAttributes(...),建议是改一下这两个参数。
- 但是
Endpoint并不是孤立的,还需要其他工具,在项目中我使用了SpringBoot进行了自动化配置,但是自己写的Controller就不能依赖自动配置了,需要手动进行配置,如果没有配置将会抛出异常TokenGranter must be provided。
public void afterPropertiesSet() throws Exception {
	Assert.state(tokenGranter != null, "TokenGranter must be provided");
	Assert.state(clientDetailsService != null, "ClientDetailsService must be provided");
	defaultOAuth2RequestFactory = new DefaultOAuth2RequestFactory(getClientDetailsService());
	if (oAuth2RequestFactory == null) {
		oAuth2RequestFactory = defaultOAuth2RequestFactory;
	}
}
该问题我复写了 afterPropertiesSet 类,将 AuthorizationServerEndpointsConfiguration 配置类注入到控制器中,在初始化 bean 前读取配置进行配置。
2. 代码实现
整理逻辑就是手动在 afterPropertiesSet 中进行配置,删除了授权界面的登陆验证逻辑,approveOrDeny 的内容在这里没有没有贴出,如果没有需要的话可以使用原内容。
    /**
     * 客户服务
     */
    @Resource(name = "clientServiceImpl")
    private ClientService clientService;
    /**
     * oauth2配置类,获取到实例,用于父类实例化配置需要
     */
    @Resource
    private AuthorizationServerEndpointsConfiguration configuration;

    @RequestMapping("authorize")
    public String authorize(@RequestParam Map<String, String> parameters,
                                  SessionStatus sessionStatus, Model model) {

        // Pull out the authorization request first, using the OAuth2RequestFactory. All further logic should
        // query off of the authorization request instead of referring back to the parameters map. The contents of the
        // parameters map will be stored without change in the AuthorizationRequest object once it is created.
        // 参数处理
        AuthorizationRequest authorizationRequest = getOAuth2RequestFactory().createAuthorizationRequest(parameters);
        // 请求类型,应该是code或者token
        Set<String> responseTypes = authorizationRequest.getResponseTypes();

        System.out.println(responseTypes);
        if (!responseTypes.contains("token") && !responseTypes.contains("code")) {
            throw new UnsupportedResponseTypeException("不支持的响应类型: " + responseTypes);
        }

        if (authorizationRequest.getClientId() == null) {
            throw new InvalidClientException("必须提供客户端id");
        }

        try {
            // 不需要授权
//            if (!(principal instanceof Authentication) || !((Authentication) principal).isAuthenticated()) {
//                throw new InsufficientAuthenticationException(
//                    "User must be authenticated with Spring Security before authorization can be completed.");
//            }

            NineyaClientDetails client = (NineyaClientDetails) getClientDetailsService()
                .loadClientByClientId(authorizationRequest.getClientId());
            if (Status.valueByCode(client.getStatus()) == Status.BANNED) {
                throw new UnauthorizedClientException("已被封禁的客户端: " + client.getClientName());
            }
            System.out.println(client);
            String redirectUriParameter = authorizationRequest.getRequestParameters().get(OAuth2Utils.REDIRECT_URI);
            // 检查客户端是否支持隐式授权或者code模式,从客户端中获取可以跳转的url列表,将url与其进行比较校验,如果
            // 不支持,或者不在url列表中存在则抛出异常
            String resolvedRedirect = redirectResolver.resolveRedirect(redirectUriParameter, client);
            if (!StringUtils.hasText(resolvedRedirect)) {
                throw new RedirectMismatchException("redirectUri 必须在 ClientDetailsi 中提供或预先配置");
            }
            authorizationRequest.setRedirectUri(resolvedRedirect);
            if (!client.isScoped()) {
                throw new InvalidScopeException(String.format("客户端 %s 不可用", client.getClientName()));
            }
            // 验证客户端请求的授权范围是否在客户端支持的授权范围之内
            oauth2RequestValidator.validateScope(authorizationRequest, client);

            // 此处不进行自动授权,跳过这个步骤,而且前面也没有对用户是否登陆进行判断
            // 同时此处不重定向到什么登陆界面,直接展示登陆界面

            System.out.println(client);
            Set<String> mustApprove = client.getMustapprove();
            LinkedList<Map<String, Object>> scopes = new LinkedList<>();
            for (String scope :authorizationRequest.getScope()) {
                ScopeEnum scopeEnum = ScopeEnum.valueOf(scope);
                boolean must = mustApprove.contains(scope);
                Map<String, Object> map = new HashMap<String, Object>(){{
                    put("type", scopeEnum.name());
                    put("info", scopeEnum.getInfo());
                    put("must", must);
                }};
                // 必须的范围放在最后面
                if (must) {
                    scopes.addLast(map);
                } else {
                    scopes.addFirst(map);
                }
            }
            model.addAttribute("clientName", client.getClientName());
            model.addAttribute("scopes", scopes);

            // Store authorizationRequest AND an immutable Map of authorizationRequest in session
            // which will be used to validate against in approveOrDeny()
            model.addAttribute(AUTHORIZATION_REQUEST_ATTR_NAME, authorizationRequest);
            model.addAttribute(ORIGINAL_AUTHORIZATION_REQUEST_ATTR_NAME, unmodifiableMap(authorizationRequest));
            return "oauth/authorize";
        } catch (RuntimeException e) {
            sessionStatus.setComplete();
            throw e;
        }
    }

    /**
     * 初始化时被调用,传入客户端服务
     * @throws Exception
     */
    @Override
    public void afterPropertiesSet() throws Exception {
        setClientDetailsService(clientService);
        setTokenGranter(configuration.getEndpointsConfigurer().getTokenGranter());
        userApprovalHandler = configuration.getEndpointsConfigurer().getUserApprovalHandler();
        super.afterPropertiesSet();
    }